Microsoft Teams on your PC, Mac, or mobile device, you can:
Microsoft Teams is a digital hub that brings conversations, content, and apps together in one place. Educators can create collaborative classrooms, connect in professional learning communities, and communicate with school staff – all from a single experience in Microsoft 365 Education.
Setup and install
Educators and students on desktops can install the application if they have the appropriate privileges.
System requirements
Windows- 7 and later
MacOS- 10.10 and later
iOS- 10 or later
Android- 4.4 and later

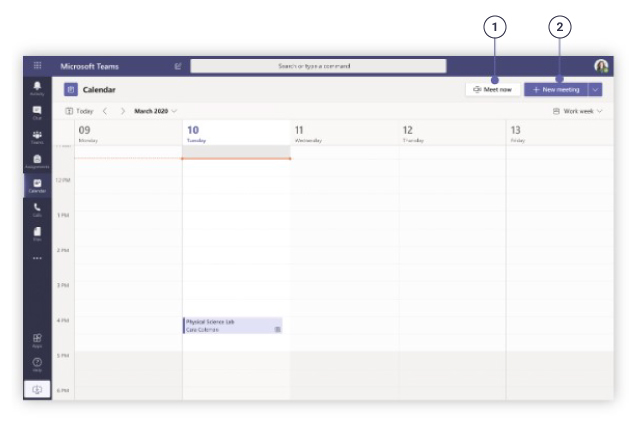
1. Start a meeting right away
Add participants directly to a meeting that starts right away.
2. Add new a meeting
Schedule a new meeting for a live discussion with up to 250 people or schedule a live event for a broadcast event with a wider audience.
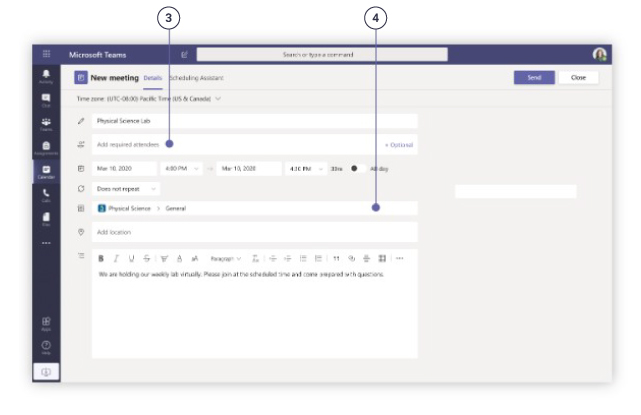
3. Invite individuals to a meeting
Invite one or more individuals to your meeting. Meeting recordings and resources shared during the meeting will be organized within the meeting history item in your Chat view.
4. Invite a channel to a meeting
Invite your whole class or working group to a meeting by selecting a channel to host the meeting. Meeting recordings and resources shared during meetings will be organized within the selected channel.
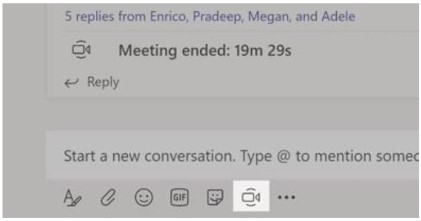
Click Meet Now under the message box to start a live meeting in a channel. If you click Reply to a message, then the meeting will be attached to that conversation. If you wish to start an independent meeting that is not tied to a channel, follow the instructions on the previous page by selecting the Calendar > New Meeting.
You can invite people to the meeting or ask them to join it directly from the channel
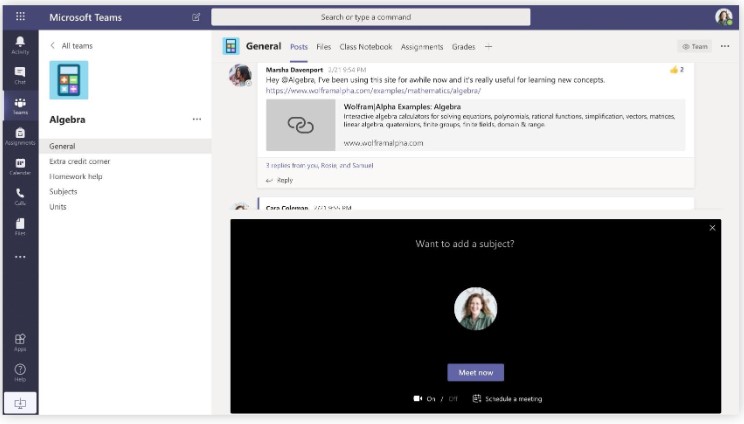
Select Meet now to start the meeting right away or Schedule a meeting to schedule the meeting for the future. Members of the channel will see an invitation for the meeting in their calendar if you decide to schedule it for later.
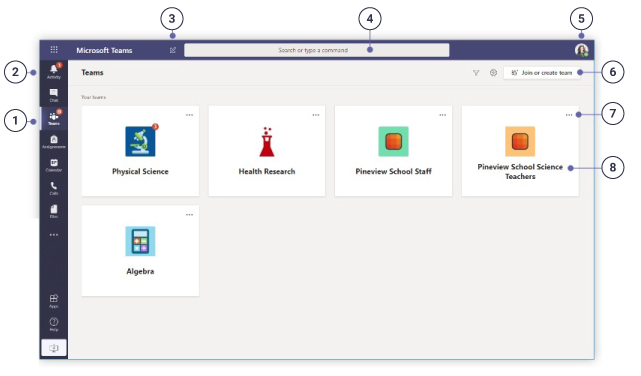
1. View and organize teams
Click to see your teams. Drag team tiles around to reorder them.
2. Navigate Microsoft Teams
Use these buttons to switch between Activity Feed, Chat, your Teams, Assignments, Calendar, and Files.
3. Start a new chat
Launch a private one-on-one or small group conversation.
4. Use the command box
Search for specific items or people, take quick actions, and launch apps.
5. Manage profile settings
Change app settings, change your pic, or download the mobile app.
6. Join or create a team
Find the team you’re looking for, join with a code, or make one of your own.
7. Manage your team
Add or remove members, create a new channel, or get a link to the team.
7. View your team
Click to open your class or staff team.


During a meeting, you can raise a virtual hand to let people know you want to contribute without interrupting the conversation.
Just select Raise your hand  in the meeting controls.

Everyone in the meeting will see that you've got your hand up.

Meeting presenters will also receive a notification that your hand is raised, and they can lower your hand once you've had a chance to talk.
Select Show participants to team button to see a list of everyone in attendance. Anyone who's raised their hand will have an icon next to their name. When multiple people raise their hands, they'll be listed in the order in which they raised them.
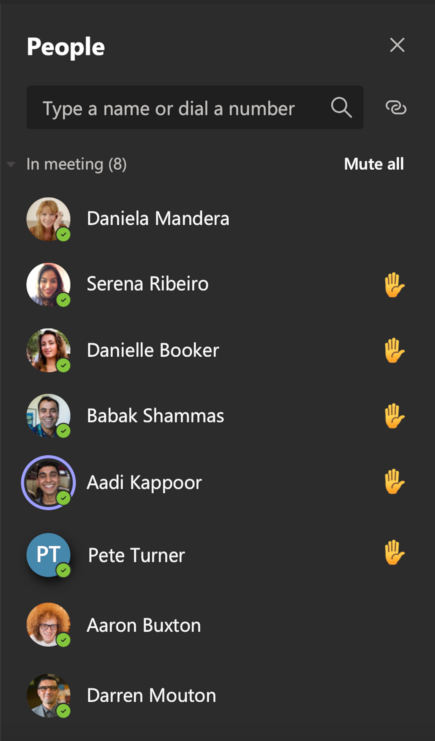
Note: This feature isn't available in one-on-one calls.
1. Start Teams.
In Windows, click Start Start button > Microsoft Teams.
On Mac, go to the Applications folder and click Microsoft Teams.
On mobile, tap the Teams icon.
Web login (In browser open) https://teams.microsoft.com
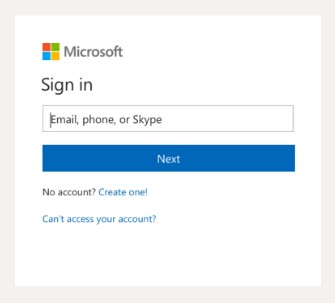
2. Sign in with your Microsoft 365 username and password.
Note: Teams is a part of Microsoft 365, so you need a Microsoft 365 Apps for business or Enterprise license to use it.
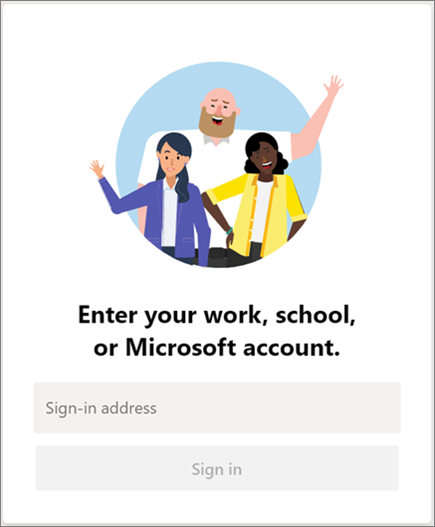
You may already have classes set up for you by your IT administrator. If not, create one.
1. Select Teams Teams button from the app bar.
2. Select Join or create team > Create team.

3. Select Class as the team type.
4. Enter a name and optional description for your class. Select Next.
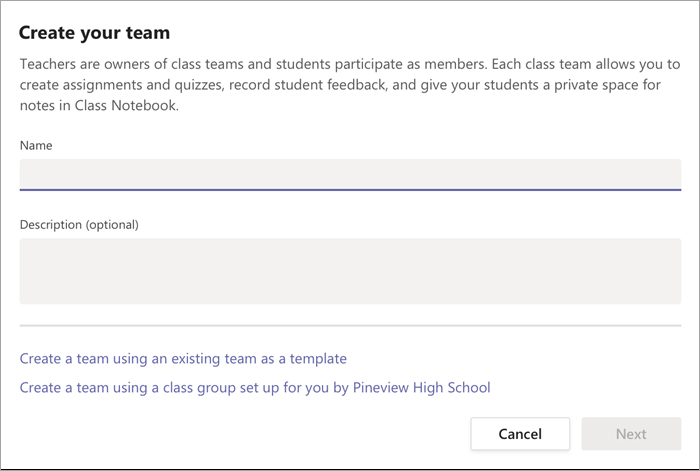
Note: Not seeing the option to create a team?
Microsoft Whiteboard is a free-form, digital canvas where people, content, and ideas come together. Whiteboard enables teams to collaborate in real time, wherever you are, and gives your ideas room to grow with an infinite canvas designed for pen, touch, and keyboard.
Whiteboard is automatically enabled for applicable Microsoft Teams.

Find and organize conversations, files, assignments, and notes in your class teams.
Channels
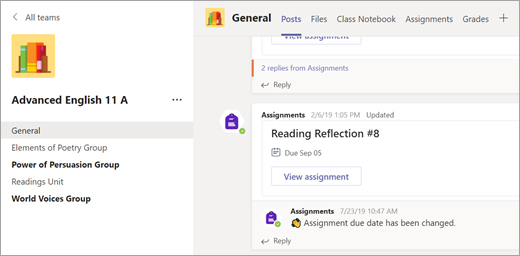
Every class team has a main discussion area, the General channel. Under General, Your teacher may create more channels to organize topics, projects, and more.
All channels include a Posts and a Files tab.
The Posts tab is where you, your classmates, and your teacher can all start and reply to conversations.
Look for shared documents in the Files tab.
Along with Posts and Files tabs, the General channel has Assignments, Class Notebook, and Grades tabs.
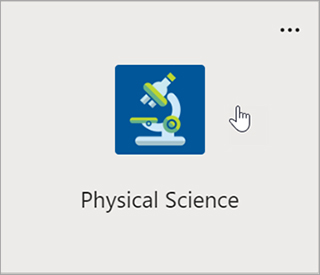
Click on the tile for your class team to see your channels.
Channels
Every class team comes with a General channel.
Channels organize all the files, conversations, and apps for a topic in one place. Channels can be created for group work, topics, units, and more.
Every channel has tabs. The General channel has these tabs:
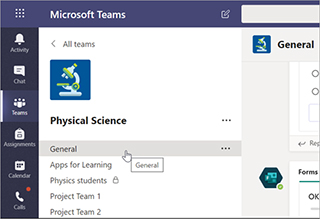

Tip: Add a tab to any channel by selecting Add a tab  .
.
Add channels
1. To add a channel, select More options next to your class team’s name, then Add a channel.
2. Enter a Name and an optional Description for your channel.
3. Choose whether you’d like your channel to be Standard or Private. Standard channels will be available to everyone. Private channels will only be available to students you choose.
4. Check the box to automatically show this channel in everyone’s channel list.
5. Click Add.
Check notifications
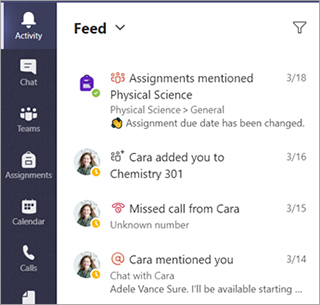
See what’s happening in class by selecting Activity in your app bar.

Use OneNote Class Notebook in Teams
Every class team comes with its own linked OneNote Class Notebook. Your Class Notebook is a digital notebook for the whole class to store text, images, handwritten notes, attachments, links, voice, video, and more.
Teams delivers these essential components of the OneNote Class Notebook experience:
The Class Notebook in the General channel is the central location for viewing and interacting with the Content Library, Collaboration Space, and each student's private space.
1. Navigate to the General channel under the desired classroom, then select the Class Notebook tab.

2. Add or edit pages using the expandable menu at the left side of your notebook.
If you haven’t set up your Class Notebook yet, you’ll be guided through the right steps the first time you visit the Class Notebook tab. You can either create a blank notebook from scratch or copy content from an existing Class Notebook.
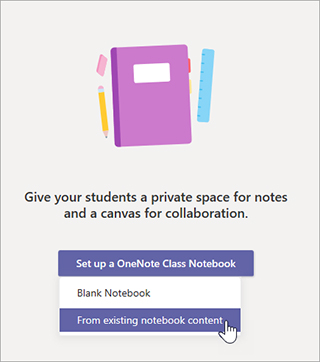
Each time you create a new channel in a class team, a new section is automatically created in the Class Notebook’s Collaboration Space. All students and teachers can edit and work on OneNote pages within a channel.
1. Navigate to a class team, then select a channel.
2. Select the Notes tab.

Expand the Class Notebook tab to a bigger size by selecting Expand tab 
Manage your Class Notebook settings by navigating to your notebook in Teams, then selecting the Class Notebook tab > Manage Notebooks.

Use these settings to:
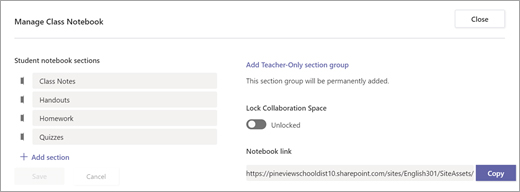
Note: To create separate Collaboration Space permissions in your Class Notebook, follow these steps. All the Class Notebooks you've created in Microsoft Teams will be listed under your Co-owned notebooks.
Add Class Notebook pages to assignments for students to work on or reference. To create an assignment using a Class Notebook page:
1. Add the page to your notebook's Content Library or Collaboration Space.
2. Then, navigate to the Assignments tab and select the New assignment button.
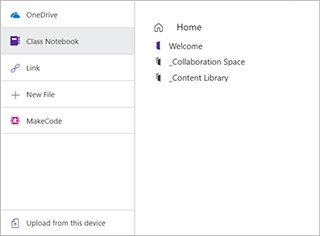
3. Fill out the details for your assignment and select +Add resources. In the box that opens, select Class Notebook and navigate through your notebook's sections to choose the page you'd like to assign.
4. Choose the section of your students' notebooks you'd like the page distributed to. For example: Handouts.
5. Select Assign when you're finished. Each student will now have a copy of the page inside their Class Notebooks. They can also open and edit the page directly from the assignment card in Microsoft Teams.
Note Check to see which version of OneNote students are using before creating your assignment. Using these versions of OneNote ensures that notebook pages you assign will lock and prevent students from editing them after the assignment's due date passes. The student's page will lock when they Turn in the assignment, but unlock when you Return an assignment or they select Undo turn in.
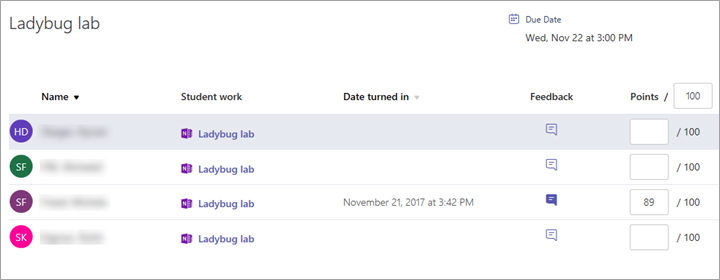
Open the assignment and select the Review button. Then, select a Class Notebook page your student has turned in under Student work to open and review it in full-screen mode. To add feedback to a student's OneNote page, select Edit in OneNote for the web. Your changes will save automatically.
Within Microsoft Teams, you can interact with Class Notebook by visiting its tab in the General channel. If you'd like to create and review assignments while within OneNote and then sync these back to your class in Teams, do so by following these steps.
Connecting your Class Notebooks with classes lets you move back and forth even more seamlessly between your apps. This is also a good option if you're already working from a Class Notebook that you didn't create in Microsoft Teams but would like to use for a class.
Select Open in OneNote to launch into OneNote and access all of Class Notebook’s learning features.
Notes:

Create an assignment
Navigate to the General channel in your class team and select the Assignments tab.
Select Create > Assignment.

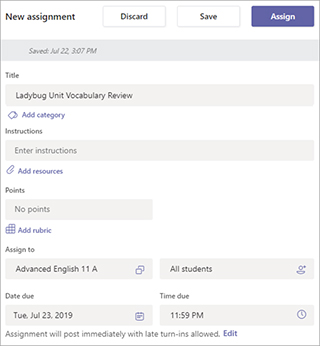
Add details to your assignment
The only thing your assignment requires to be saved is a title. All other fields are optional.
Tip: Read more step-by-step instructions for reusing assignments, assigning quizzes, and more.
When you are finished, select Assign. To save this assignment as a draft, select Save.
More on adding resources
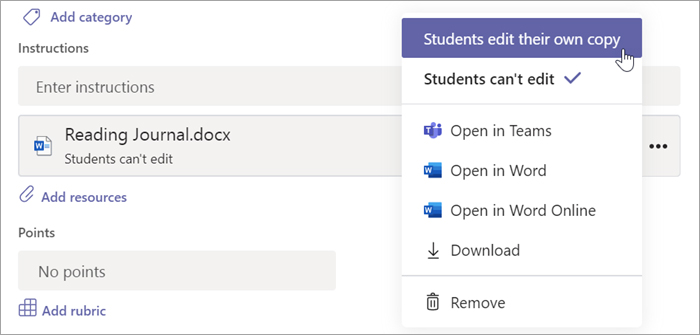
1. Select Add resources to choose an existing file or create a blank Office 365 document to assign to each student.
Select Attach.
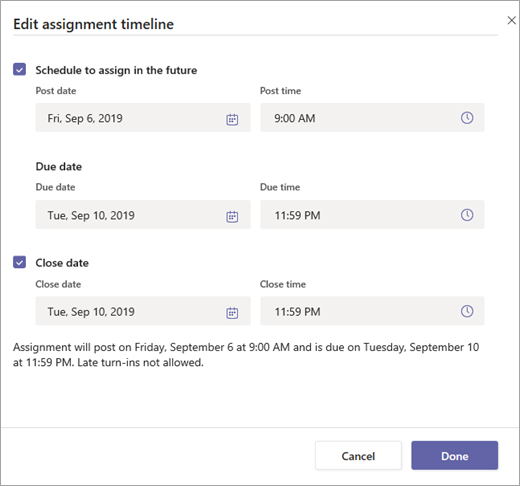
Choose an assignment timeline
1. To adjust when an assignment is sent out or whether you'll accept late assignments, select Edit underneath the due date field.
2. Make your selections and click Done.
Note: To add co-teachers to this class team, choose the Teachers tab and enter names.
View grades
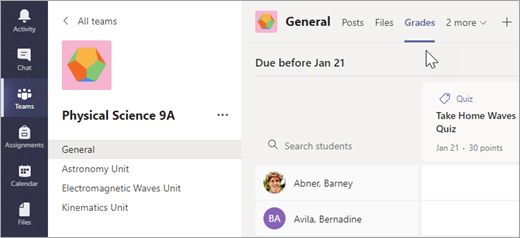
Track student progress and access grades in the Grades tab.
1. Navigate to General channel of your class team and select the Grades tab.
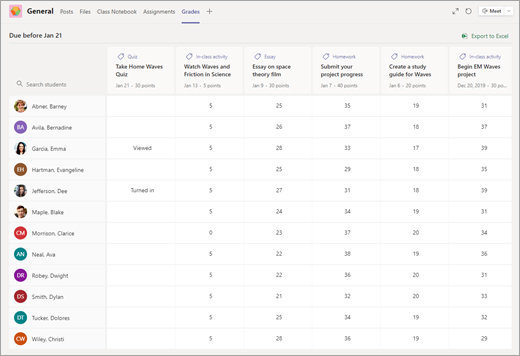
Assignments appear in rows and your students in a column. Assignments are ordered by due date, with the nearest date at the beginning. Scroll down or across to continue viewing assignments.
Your students' work will have different statuses:
Start grading
You can click on any cell in the Grades tab to edit it.
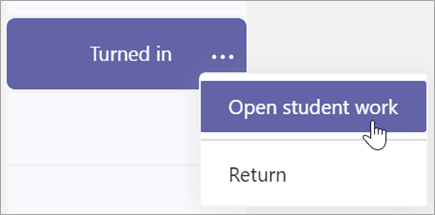
1. To begin grading, select More options button on a cell, then Open student work.
2. This will open your student's assignment with a Feedback and Points field you can fill in.
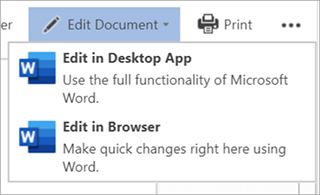
3. To write comments on the document itself, select Edit Document, and then either choose to edit in the desktop app or your web browser.
4. Click the arrows next to the student's name to move between student assignments.
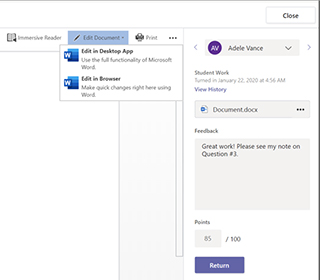
5. Select Return when you are done grading and want to return an assignment to a student. This means they will be notified and can see your feedback.
Return multiple grades at once
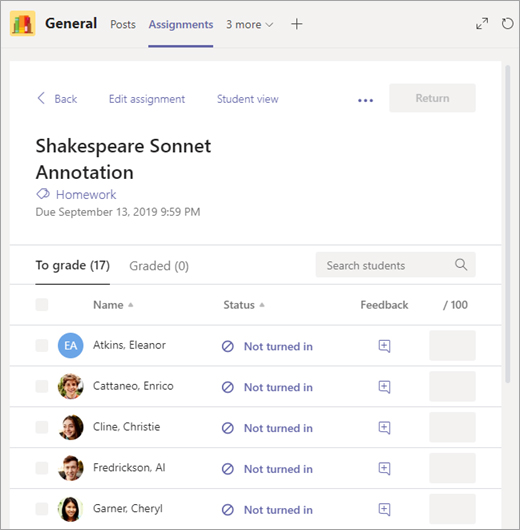
1. To return more than one student grade at the once, click on the Assignments tab.
2. Select an assignment.
3. You can enter feedback and points here without opening student work.
4. Use the checkboxes to select which student work to return, or if you'd like to select all.
5. Click Return.
1. Enter student names and select Add. If your school has already created class groups,
2. Select Done when you’re finished.
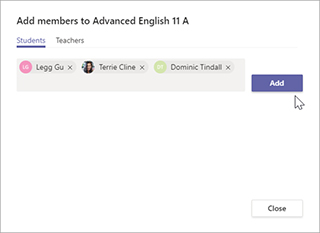
Note: To add co-teachers to this class team, choose the Teachers tab and enter names.
You’re done!
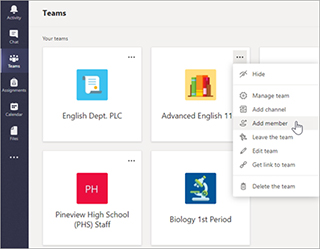
To add students or make changes to this team later, navigate to the team and select More options...

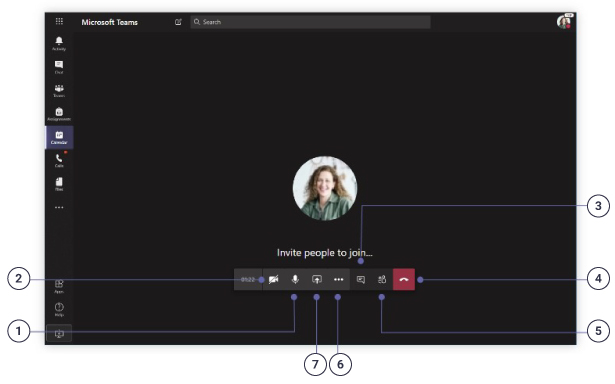
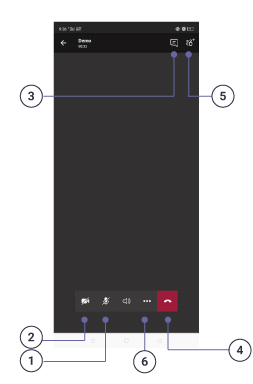
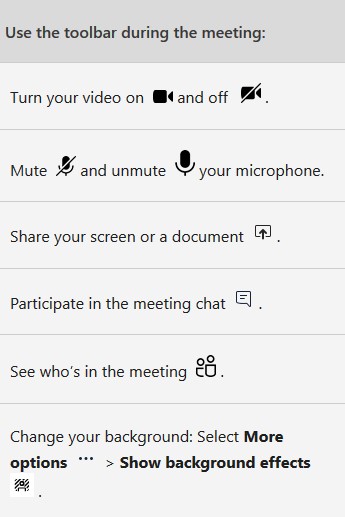
1. Mute and unmute yourself.
2. Turn your video feed on and off.
3. Send chat messages
Send chat messages, share links, add a file, and more. Resources you share will be available after the meeting.
4. Leave the meeting.
The meeting will continue even after you have left.
5. Add/view participants to the meeting.
6. Access additional call controls
Start a recording of the meeting, change your device settings, and more.
7. Share your screen and sounds from your computer.
Create and respond to messages in Teams.
Message your class
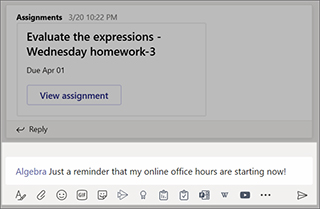
1. To create a message for your whole class, click Teams  , then pick a class team and a channel.
2. Select the Posts tab.
3. Click the compose box, type your message, and click Send  .
.
4. Use @ and the name of your class to notify everyone of your post. Example @Algebra.
Start a conversation with one student or a group of students
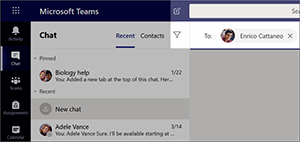
1. At the top of the app, click New chat New chat  .
.
Reply to a conversation
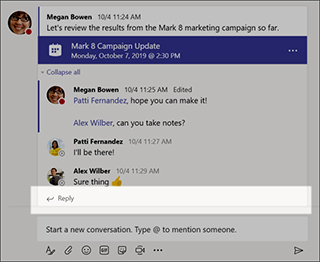
Posts in channels are threaded like social media posts. Reply under the original post to keep all the messages in a conversation organized together.
1. Find the conversation thread you want to reply to.
2. Click Reply, add your message, and click Send  .
.
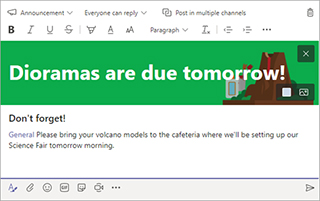
Announcements
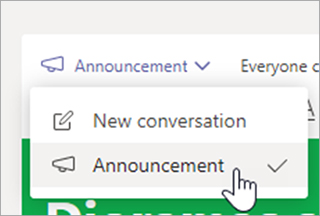
Use the Announcements feature to draw your students' attention to important posts.
1. Select Format to expand the Compose box.
2. Choose Announcement and Select a background color to customize an important post.
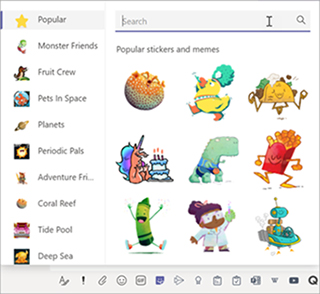
Add some fun with stickers and more
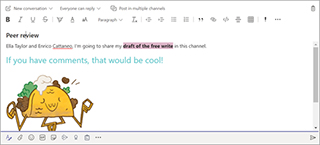
1. Click Sticker Sticker  under the compose box to select from a range of custom Microsoft Education stickers.
Select Emoji  button for smiley faces and Giphy GIF
  for animated
GIFs.
Create and send a message in a chat or channel
Click the compose box to create a message. You can type out a simple message, or add on.
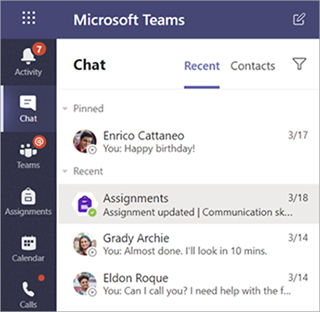
To switch from a conversation in a team channel to a private chat group, select the Chat icon.
Connect with video
Use meetings in Teams to virtually join your teacher and classmates in online classes, study groups, presentations, and whenever you need to learn face-to-face.
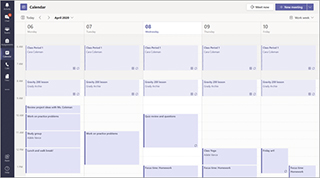
1. Select Calendar  to see any meetings your teacher or classmates have added you to, or any you've created yourself. Click Join when it’s time to meet.
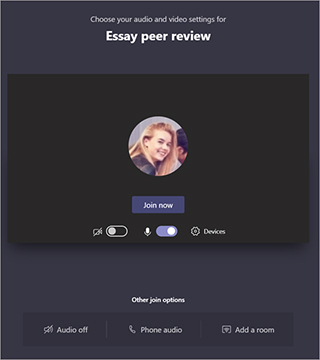
2. Adjust your audio and video settings, then click Join now.


Share files in conversations and use the Files tab to keep track of them.
Share a file
Any file you share in a channel or chat can be opened by all the students in that channel or chat.
Tip: Teams works particularly well with Microsoft Office documents.
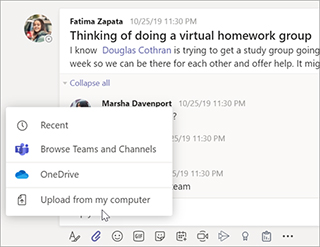
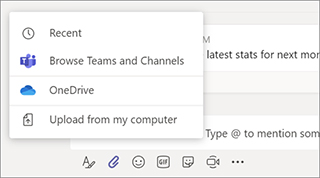
1. In your channel conversation, click Attach  under the box where you type your message.
2. Select from these options:
3. Select a file > Share a link.
If you're uploading a file from your computer, select a file, click Open, and then Send  .
.
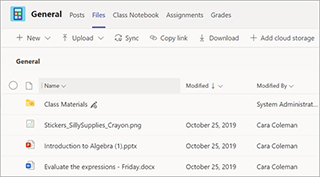
The file you shared can be found in the Files tab.

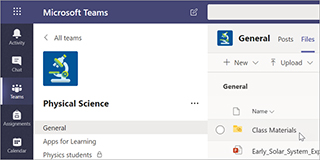
Add Class Materials
1. Navigate to the General channel in your class team.
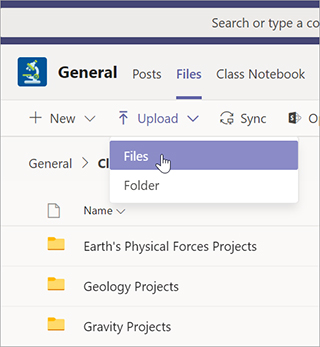
Select the Files tab, then the Class Materials folder.
3. Select Upload to add files from your OneDrive or device.
Share a file in a channel or chat
1. Click Attach 
2. Choose a file you'd like you to share.
3. Include a message if you want, then click Send 
Find or create a file
See the files that you, your classmates, and teacher have shared in one of your team's channels by selecting the Files tab.
While in files, you can create a new Word, Excel, or PowerPoint document for you and your classmates to collaborate in.
Class Materials
In the Files tab, your teacher might add read-only resources to the Class Materials folder. Look here for important documents that can help you with assignments, projects, or just staying up to date on class expectations.
